


Handwriting develops in stages.
One of these milestones is learning how to size letters, which makes words look neater and more readable… but how do we teach it to children?
Here’s a classic and beloved tool used by teachers and occupational therapists. It helps with letter sizing, placement and formation.
It’s called Sky Grass Dirt. Letters are grouped into three categories:
- Tall letters that reach up to the sky, like b, d, f, h, k, I, t
- Short letters that stay in the grass, like a, c, e, I, m, n, o
- Tail letters that start in the grass and go down into the dirt, like g, j, p, q, y
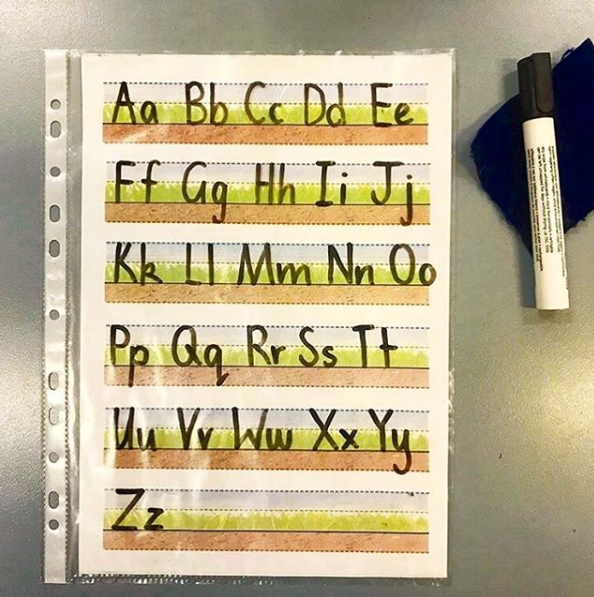
As resources, you will need adapted paper, which supports children with visual difficulties to write legibly. Common examples are paper with coloured areas or bold lines which will help define the letter height.
You can buy adapted paper exercise books and laminate a sheet of it or put it in a plastic sleeve. Write on it with a non-permanent marker so you can keep on using multiple times.
Start your child with writing big letters by using paper with bolder lines spaced further apart.
As writing skills progress, switch to smaller spaced sheets.
Have you seen or used this tool before? Let us know your thoughts!
This blog post was edited from Jessica Lee’s blog.
Jessica Lee is an Occupational Therapist at Plumtree. You can find more tips on her Instagram blog: jessthanperfect_ot